The 10 Best Exercises for Your Chest

Your chest is used for every movement where your arms push forward, including when pushing at an upward or downward angle. Along with the triceps and anterior deltoids, you can think of the pectorals as your “pushing muscles.”
And aesthetically, a big chest makes you look strong, helps you look really built in a tight t-shirt, and makes your waist look slimmer by comparison.
Related: The At-Home Strength Band Workout for Your Chest
With that said, here are the 10 best chest exercises that you can do either at home or at the gym. The bodyweight and resistance band movements are also great travel exercises, as they require either no equipment or a single light resistance band, which can be easily packed into a suitcase.
What Are the Best Exercises for Building a Bigger Chest?
1. Hand-Release Push-Up
Hand-release push-ups are push-ups with a functional twist: You lift your hands off of the ground for a moment at the bottom of each rep. This forces you to use a full range of motion without relying on momentum, and builds a bit of shoulder blade mobility in the process.
How to do a hand-release push-up
- Get into a push-up position with your palms at shoulder width.
- Lower yourself to the floor (as in a push-up) until your head touches the floor.
- Lift your palms slightly off the floor, pushing your shoulder blades back.
-
Return your palms to the floor and push back up.
2. Deficit Push-Up
Deficit push-ups are push-ups performed “from a deficit,” meaning that your hands are elevated above the ground, allowing you to go below the starting point of the exercise. This allows for a more full range of motion because push-ups are normally interrupted by your face touching the floor. This means that normal push-ups leave out the bottom of your chest, arms, and anterior deltoids’ range of motion.
How to do a deficit push-up
- Place two foam blocks, stacks of barbell plates, or other stable 6 inch-high (or more) objects on the floor, shoulder width apart.
- Get into a push-up position with your hands on the blocks.
- Push yourself all of the way up (as in a normal push-up).
-
Lower yourself, and keep going down until you reach the end of your useful range of motion. Your face should be below your hands at the bottom of the movement.
3. Offset Push-Up
Offset push-ups add another level of difficulty by using an asymmetrical arm stance. As such, one arm has a more difficult job to do than the other one, your obliques and back have to work harder to stabilize your body, and your balance and coordination are challenged in a way that doesn’t happen with symmetrical exercises.
Related: Spartan Notes: Unilateral Exercises to Add to EVERY Workout (+ Why)
How to do an offset push-up
- Get into a push-up position.
- Move one arm forward and to the outside a few inches. The further out you move it, the harder the push-up will be.
- Perform a push-up as normal. Go slow for the first few reps to see if the offset position causes any joint issues. After that, go as fast as possible.
Note that you can do this a few different ways: One hand can be forward, to the outside, elevated slightly, or any combination of those three. Make sure that you alternate arms from one set to the next, and always offset both arms the same way, so that you’re ultimately building a symmetrical musculature.
4. Offset Slow Push-Up
Offset push-ups can be made even more difficult by going slowly, so you can’t rely on momentum or the “bounce effect” (muscle elasticity, essentially) to help yourself get over the hardest parts.
How to do an offset slow push-up
- Get into a push-up position.
- Move one arm forward and to the outside a few inches. The further out you move it, the harder the push-up will be.
- Perform a push-up as normal, but go as slow as possible: 3 seconds up, 5 seconds down.
- (Optional) Add a 1-second hold at the bottom.
Again, make sure that you alternate arms from one set to the next, and always offset both arms the same way, so that you’re ultimately building symmetry.
5. Banded Push-Up
At some point, push-ups get too easy for many people, and that’s where banded push-ups come in. Adding a resistance band effectively adds “weight” to the exercise, and at the same time incorporates accommodating resistance — making the exercise harder near the top, which is normally the easiest part of a push-up.
How to do a banded push-up
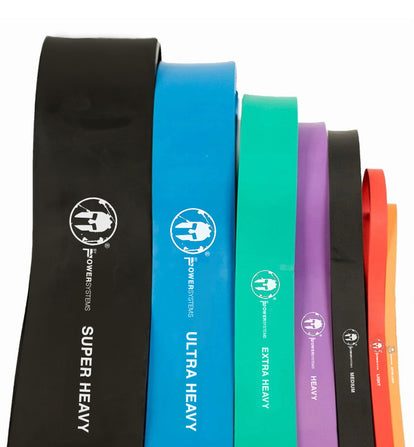
- Take a fit loop resistance band and hold the ends in either hand. Wrap the middle of the band behind your back, on level with your chest.
- Get into a push-up position. Make sure that the band has stayed wrapped behind your back, roughly on level with your chest.
- Perform a push-up as normal, and go slowly.
For this exercise, try to use a resistance band that provides resistance equal to 20–40% of your body weight. At that level, the push-up should feel equally difficult near the top and at the bottom of the movement.
MORE: The 20 Best Exercises for Your Shoulders
6. Supine Banded Chest Press
The supine banded chest press takes the same movement pattern of the banded push-up and has you perform it on your back, so the resistance comes entirely from the band. That means the top of the movement may actually be harder than the bottom — unusual for a pushing movement — and it also means you can use a resistance that is lower than your body weight, which is helpful for people who can’t do push-ups yet.
How to do a supine banded chest press
- Take a fit loop resistance band and hold the ends in either hand. Wrap the middle of the band behind your back, on level with your chest.
- Lay on your back on the floor.
- Slowly press the band upward until your arms are locked out, then lower it until your hands are at either side of your chest or until the band goes slack.
For this exercise, try to use a resistance band that provides resistance equal to 60–140% of your body weight, depending on your strength. Also, try to use a band that is short enough to not go slack before your hands are down to chest level. You can double the band up (which will also double the resistance) if you need to.
7. Supine Dumbbell Chest Fly
The dumbbell chest fly is a chest isolation exercise. The supine dumbbell chest fly is simply a dumbbell fly performed while lying on your back. It is useful for post-fatiguing your chest after other compounded chest exercises, such as push-up variants.
How to do a supine dumbbell chest fly
- Take two light dumbbells and lay on your back, either on a bench or on the floor.
- Hold your arms horizontally out to your sides, on level with your shoulders.
- Slowly swing your arms up, keeping them almost completely straight (but slightly bent) until you bring the dumbbells together above your body.
- Slowly lower your arms back down to your sides until the dumbbells touch the floor or, if you're on a bench, until they go just below the level of your body.
Note that a bench will give you a slightly greater range of motion, but may cause you to get stuck at the bottom — the most difficult part of the movement.
MORE: The 30 Best Exercises for Functional Strength and Mobility
8. Supine Dumbbell Chest Press
The dumbbell chest press is a step up from the barbell bench press. Not only can you do it at home, but the dumbbells allow your arms more freedom of movement, involving more muscles and challenging your nervous system to stabilize your arms. The supine dumbbell chest press is simply that: performed lying on your back.
How to do a supine dumbbell chest press
- Take two light dumbbells and lay on your back, either on a bench or on the floor.
- To begin with, hold the dumbbells on top of your chest, oriented left to right.
- Press the dumbbells upward until your arms lock out.
- Slowly lower the dumbbells until they are just above your chest. Do not allow them to rest on your chest.
9. Supine Single-Arm Dumbbell Chest Fly
The dumbbell chest fly is a great chest isolation exercise, and performing it one-handed allows you to take advantage of bilateral deficit for more power while forcing you to stabilize your body.
How to do a supine single-arm dumbbell chest fly
- Take one light dumbbell in one hand and lay on your back, either on a bench or on the floor.
- Hold your arms horizontally out to your sides, on level with your shoulders. If you're on the floor, the arm not holding a dumbbell should be palm down on the floor to stabilize you.
- Slowly swing the arm holding the dumbbell up, keeping it almost completely straight (but slightly bent) until you’re holding the dumbbell straight up above your chest.
- Slowly lower your arm back down to your side until the dumbbell touches the floor or, if you're on a bench, until it goes just below the level of your body.
Note that a bench will give you a slightly greater range of motion, but may cause you to get stuck at the bottom — the most difficult part of the movement.
10. Supine Single-Arm Dumbbell Chest Press
The supine single-arm dumbbell chest press is a compound chest exercise. Like the two-arm dumbbell chest press and the single-arm dumbbell fly, it takes advantage of bilateral deficit for more strength while forcing you to stabilize your body.
How to do a supine single-arm dumbbell chest press
- Take a heavy dumbbell in one hand and lay on your back, either on a bench or on the floor.
- To begin with, hold the dumbbell on top of your chest, oriented left to right. Keep your other arm down and to your side.
- Press the dumbbell upward until your arm locks out.
- Slowly lower the dumbbell until it is just above your chest. Do not allow it to rest on your chest.
Alternatively, you may hold dumbbells in each hand and alternate hands on each rep. If you do it this way, use somewhat lighter dumbbells and keep the non-moving dumbbell held just above your chest.